
0. 개요
- 이전 포스팅은 '이미지 파일'을 다루는 것에 초점을 두었다.
이번 포스팅은 동영상 파일(MP4)를 업로드 기능을 구현하고자 한다.
[현 상태에서 동영상(MP4) 파일 업로드 한다면...?]
1. '동영상 파일(MP4)' 업로드 시도

'tiger_mp4.mp4' 동영상 파일을 선택하고 '업로드'버튼을 눌러 업로드를 시도한다.
2. 에러 결과 확인


위와 같은 오류메시지가 발생한다.
1. 포스팅 목표
Resolved [org.springframework.web.multipart.MaxUploadSizeExceededException: Maximum upload size exceeded]
에러코드를 살펴보았을때, '최대 업로드 크기 초과'를 의미한다.
따라서, '파일 업로드 크기 증가' 를 설정해주어야 한다.
[tiger_mp4.mp4의 파일 크기]

'2.38MB'의 크기를 파일 업로드가 수용하지 못하는 것이다.
1. '파일 업로드 크기'를 증가시켜야 한다.
2. '동영상 파일(.mp4)'을 업로드 해야 한다.
3. 이미지, 동영상 형식 뿐만 아니라 다른 형식도 업로드 가능해야 한다.
위 3가지 당면한 문제를 해결해야 한다.
2. 기능구현 (코드)
1. 'application.yml' - '파일 업로드 크기 설정'
spring:
  # 업로드 파일의 최대 크기를 설정
  servlet:
    multipart:
      enabled: true
      max-file-size: 10000MB #10GB
      max-request-size: 10000MB #10GB
#      file-size-threshold: 0

이하 생략...SpringBoot의 'spring.servlet.multipart' 설정은 멀티파트 파일 업로드와 관련된 설정을 정의한다.
멀티파트는 '파일'과 관련된 것이라고 생각하면 된다.
1. 'spring.servlet.multipart.enabled'
- 멀티파트 요청(파일 업로드)을 활성화할지 여부를 결정하는 설정
- 기본값은 true
- 파일 업로드를 활성화한다면 true로 설정한다.
-> 파일 업로드를 활성화해야 하기 때문에 'true'로 설정한다.
2. 'spring.servlet.multipart.max-file-size'
- 업로드 가능한 단일 파일의 최대 크기를 정의
- 크기 단위를 직접적으로 사용하여 정의할 수 있다.
- EX) '10MB', '100KB', '1GB', ...
- 설정된 크기를 초과하는 파일 업로드시 예외가 발생하며 요청은 처리되지 않는다.
-> '10000MB' 로 설정한다.
3. 'spring.servlet.multipart.max-request-size'
- 전체 요청의 최대 크기를 정의
- 한번에 요청에 여러개의 파일을 업로드할때, 총합 크기를 제한한다.
- 정의 방식은 앞선 속성과 동일하다.
-> '10000MB' 로 설정한다.
4. 'spring.servlet.multipart.max-size-threshold'
- 파일 업로드 시 임시 저장소에 저장하기 전에 메모리 내에서 처리할 파일 크기 한도를 설정
- 설정된 크기보다 큰 파일은 업로드시 디스크의 임시 디렉토리에 저장
- 기본값은 '0'으로 이 경우 모든 파일이 바로 디스크에 저장된다.
이와 같이 설정하여, 동영상 파일과 같이 비교적 큰 용량의 파일을 업로드하기 위해 크기 제한을 늘린다.
2. 'SaveFile.java' - Entity
@Entity
@Getter
@Builder
@NoArgsConstructor(access = AccessLevel.PROTECTED)
@AllArgsConstructor
public class SaveFiles {

    @Id @GeneratedValue(strategy = GenerationType.IDENTITY)
    private int id;

    private String title;
    private String imageUrl;
    private String fileType;

    //파일이 소속된 게시글
    @ManyToOne(fetch = FetchType.LAZY)
    @JoinColumn(name = "posts_id")
    private Posts posts;

    @CreationTimestamp
    private Timestamp createDate;
}
3. 'FileRepository.java' - JPA로 구현
4. 'FileService.java' - 이미지 / 동영상 통합 처리
@Service
@RequiredArgsConstructor
@Transactional(readOnly = true)
public class FileService {

    private final FilesRepository filesRepository;

    //파일 업로드 경로 지정
    @Value("${file.path}")
    public String uploadFolder;

    private static final long MAX_FILE_SIZE = 1024L * 1024L * 1024L * 10L; //10GB

    @Transactional
    public void uploadFile(FilesUploadDto filesUploadDto) {

        checkFileType(filesUploadDto.getFile());

        //파일명 구성
        UUID uuid = UUID.randomUUID();
        String fileName = uuid + "_" + filesUploadDto.getFile().getOriginalFilename();
        System.out.println("파일명: " + fileName);

        //파일 경로 설정
        Path path = Paths.get(uploadFolder, fileName);

        try {
            Files.write(path, filesUploadDto.getFile().getBytes());
        } catch (Exception e) {
            e.printStackTrace();
        }

        String[] types = filesUploadDto.getFile().getContentType().split("/");//파일 타입 입력
        filesUploadDto.setFileType(types[0]); //image, video, text ...
        SaveFiles saveFiles = filesUploadDto.toEntity(fileName);
        filesRepository.save(saveFiles);
    }


    /**
     * 파일 타입 확인하기
     */
    private void checkFileType(MultipartFile file) {
        String contentType = file.getContentType();
        System.out.println("파일 타입: " + contentType);
    }

    public List<SaveFiles> findAll() {
        return filesRepository.findAll();
    }
}
5. 'MainController.java'
@Controller
@RequiredArgsConstructor
public class MainController {

    private final FileService fileService;

    @GetMapping("/")
    public String index(Model model) {
        model.addAttribute("list", fileService.findAll());
        model.addAttribute("uploadPath", "/upload/");
        return "index";
    }

    @PostMapping("/")
    public String coverImageUpload(FilesUploadDto filesUploadDto) {

        if(filesUploadDto.getFile().isEmpty()) {
            throw new RuntimeException("File is empty");
        }

        fileService.uploadFile(filesUploadDto);
        return "redirect:/";
    }
}
6. 'index.html'
<div th:if="${!list.isEmpty()}" th:each="file : ${list}">
    <div class="card" style="width: 18rem;">

        <!--이미지 파일-->
        <div th:if="${file.fileType == 'image'}">
            <img th:src="${uploadPath + file.imageUrl}" class="card-img-top" alt="이미지">
        </div>

        <!--동영상 파일-->
        <div th:if="${file.fileType == 'video'}">
            <video class="card-img-top" controls>
                <source th:src="${uploadPath + file.imageUrl}" type="video/mp4">
                Your browser does not support the video tag.
            </video>
        </div>

        <div class="card-body">
            <h5 class="card-title" th:text="${file.title}">Card title</h5>
            <p class="card-text" th:text="${file.imageUrl}">Card Content</p>
            <p class="card-text" th:text="${file.getFileType()}">Card Content</p>
        </div>
    </div>
</div>
3. 작동확인
1. 업로드할 파일 목록

텍스트, 이미지, 동영상 파일이 존재한다.
2. 6개의 파일을 순서대로 업로드

파일이 순서대로 업로드 된 것을 확인할 수 있습니다.
3. 업로드된 파일 확인

업로드된 파일이 저장된 것을 확인할 수 있다.
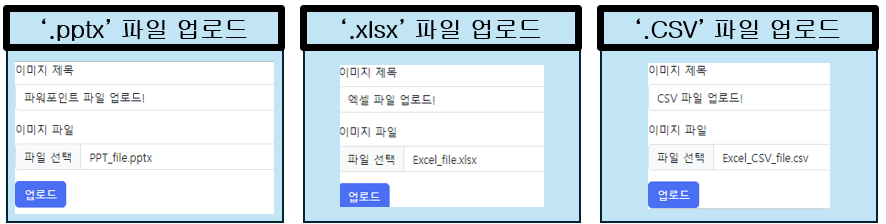
+) '.pptx' , '.xlsx' , 'CSV' 파일 업로드
주로 사용되는 파일 종류들을 업로드 가능한지 테스트 하겠다.

위 3가지 파일을 웹 서비스의 '파일 업로드' 기능을 통해 파일 업로드를 진행할것이다.
웹을 통해 파일 업로드를 진행한다.

서버 로컬 저장소에 정상적으로 업로드 된 것을 확인할 수 있다.

웹 화면에서도 업로드된 파일들을 확인 할 수 있다.
4. 마무리
포스팅 시작시 정해놓은 3가지 목표를 모두 달성했다.
1. 파일 업로드 크기 늘리기
2. 동영상 파일 업로드 가능하게 하기
3. 다른 타입 파일 업로드 가능하기 하기
- 다양한 종류의 타입이 모두 업로드 가능한 것을 확인하였다.
서버의 로컬 서버에 업로드 파일을 저장하는 방식을 구현해 보았다.
다른 파일 업로드 방식에 대해 알아보고 각각 방식의 장단점을 정리해 보아야 한다.
- 시리즈 포스팅 확인하기
[SpringBoot - 파일 다루기] 1. 이미지 파일 업로드 및 저장하기
https://notorious.tistory.com/422
[SpringBoot - 파일 다루기] 1. 이미지 파일 업로드 및 저장하기
0. 개요게시판 등 다양한 웹서비스에서 제공하는 기능인 파일 업로드 기능을 구현하는 것을 목표로 한다.다양한 파일 업로드 중 '이미지' 파일 업로드를 첫 대상으로 한다. 기존에 제작했던 게
notorious.tistory.com
[SpringBoot - 파일 다루기] 2. 업로드한 이미지 파일 웹에서 확인하기
https://notorious.tistory.com/423
[SpringBoot - 파일 다루기] 2. 업로드한 이미지 파일 웹에서 확인하기
0. 개요- 이전 포스팅에서 클라이언트가 '이미지 파일'을 업로드 하여, 서버에 저장하는 기능을 구현하였다.저장된 이미지를 클라이언트가 확인하는 기능이 필요하다는 것을 느꼈다.따라서, 클
notorious.tistory.com
'Spring' 카테고리의 다른 글
| [SpringBoot - 파일 다루기] DB에 파일 직접 저장하기 (BLOB / Base64) (2) | 2025.02.01 |
|---|---|
| [SpringBoot - 파일 다루기] 4. 기존 게시판 프로젝트에 '파일 업로드' 기능 추가하기 (완) (2) | 2025.01.29 |
| [SpringBoot - 파일 다루기] 2. 업로드한 이미지 파일 웹에서 확인하기 (1) | 2025.01.23 |
| [SpringBoot - 파일 다루기] 1. 이미지 파일 업로드 및 저장하기 (1) | 2025.01.21 |
| [SpringBoot - 파일 다루기] 0. 프로젝스 생성 및 설정 (0) | 2025.01.19 |